
How to Broadcast from an IP Camera to Boomstream
To start a broadcast from an IP camera, you need to obtain the video stream and redirect it to the Boomstream server. We support two methods for broadcasting via IP cameras:
- Direct broadcasting from the IP camera to Boomstream
- Broadcasting via external software (OBS Studio or FFmpeg)
Method 1: Broadcasting Directly from an IP Camera
Step 1: Connect Your IP Camera to the Internet
First, ensure your IP camera is connected to the internet.
Dynamic DNS Configuration: If you don't have a static IP address, configure your camera using Dynamic DNS (DDNS) technology. Some manufacturers provide this capability built-in, or you may need to use a third-party DDNS service.
Step 2: Obtain the RTSP Stream Link
Get the RTSP link to your camera's video stream. This can typically be found in the camera's control panel or in the manufacturer's manual. The video stream link usually follows this format:
rtsp://CAMERA_IP_ADDRESS:554/live
Step 3: Add the IP Camera to Boomstream
- Log in to your Boomstream account
- Navigate to Online Broadcasts
- Click the Create button
- Select IP Camera from the options
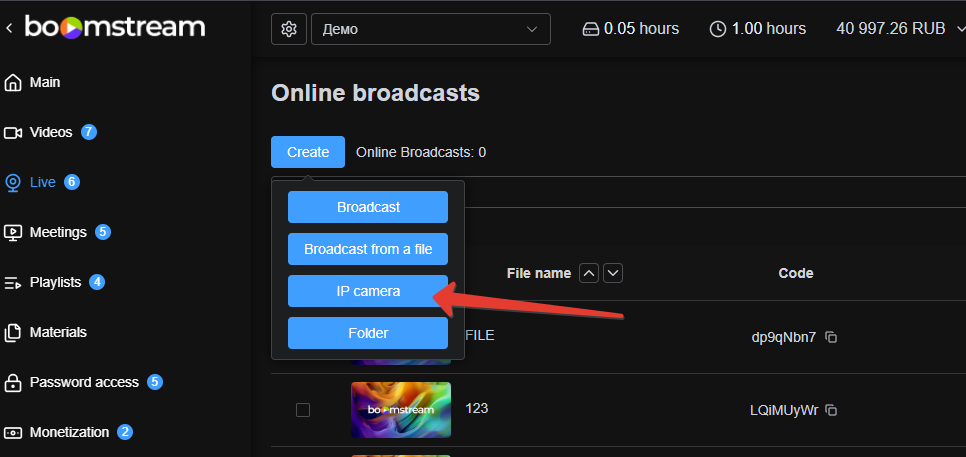
Step 4: Configure Camera Settings
In the configuration window, specify the following:
- Broadcast Name - Enter a descriptive name for your camera/broadcast
- Camera Address - Paste the RTSP link to the stream
- Authorization - Enter the Login and Password for the IP camera (if authentication is required)
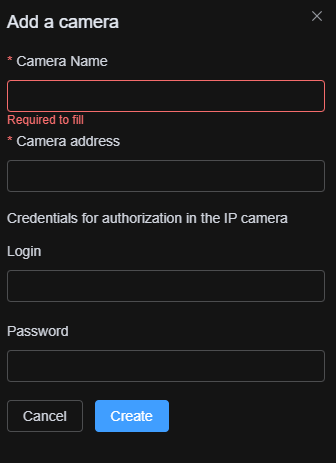
Step 5: Access the Broadcast Card
After adding the IP camera to the system, the broadcast card will open with comprehensive settings and management options:
1. Publishing Player
Access various embedding options for your broadcast, including direct links and HTML embed code.
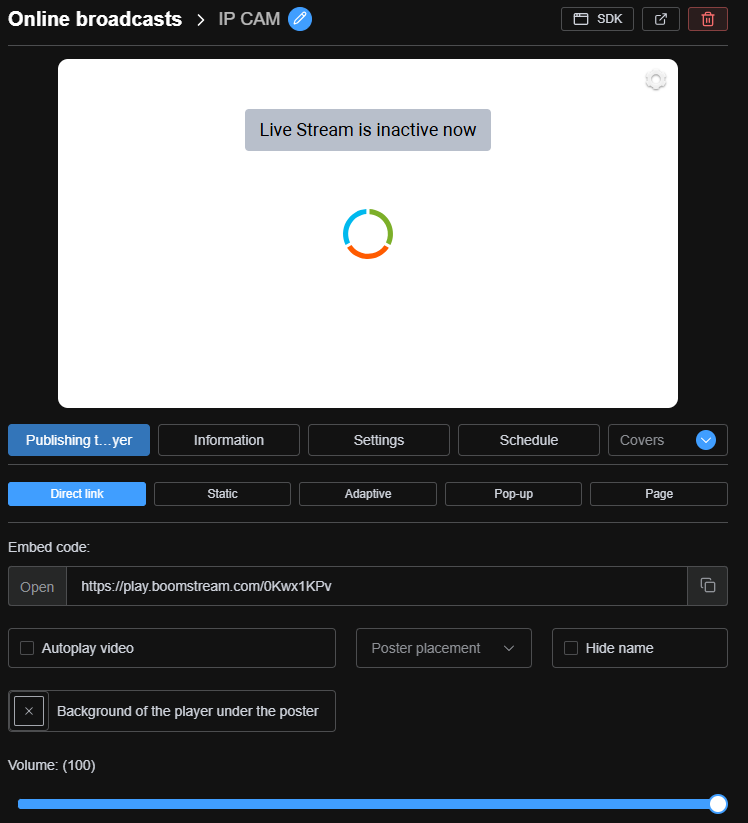
2. Information
View general information and metadata about your broadcast.
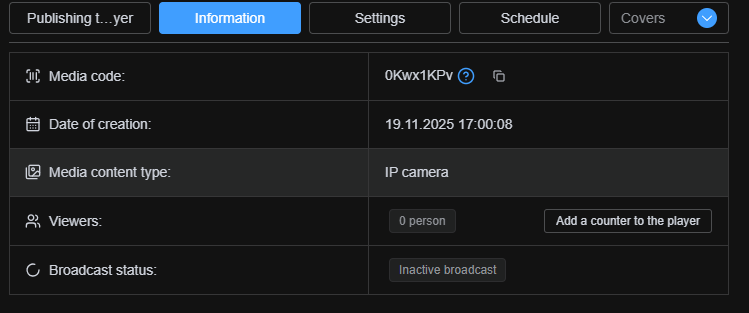
3. Settings
Configure additional options including:
- Adding a description
- Enabling recording
- Modifying camera connection data

4. Schedule
Schedule the broadcast to start at a specific time or start it immediately.
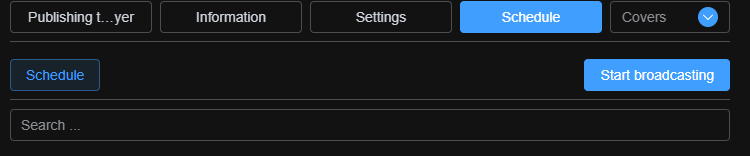
5. Additional Features Menu
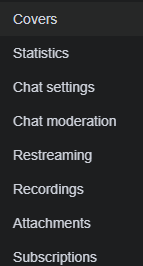
Click this section to access advanced management tabs:
- Covers - Add and select custom cover images for the broadcast
- Broadcast Statistics - View detailed analytics and viewer data
- Chat Settings - Enable and configure live chat functionality
- Chat Moderation - Moderate chat messages in real-time
- Restreaming - Enable restreaming to other platforms (YouTube, Facebook, etc.)
- Recordings - Manage recorded broadcasts
- Attachments - Attach additional materials (PDFs, links) to the player
- Subscriptions - Add the broadcast to access lists and view current permissions
Method 2: Broadcasting via External Software
If direct connection isn't possible, use external software to relay the IP camera stream to Boomstream. Supported software includes:
- FFmpeg (command-line tool)
- Open Broadcaster Software (OBS Studio) with IP camera plugin
Option A: Broadcasting Using OBS Studio
-
Install OBS Studio
Download and install the latest version from https://obsproject.com/download -
Install the IP Camera Plugin
Install the Video Source Plugin for OBS: https://obsproject.com/forum/resources/video-source-plugin.20/Installation guide: https://obsproject.com/forum/threads/how-to-install-obs-plugins.4912/
-
Configure the Video Source
- After installing the plugin, a new source type called "Video" will appear in the Sources panel
- Click the + button to add a new source
- Select "Video" from the list
- In the settings, specify your RTSP stream link
- Ensure the "Video" source is checked/enabled in the Sources list
-
Connect to Boomstream
Follow the standard OBS broadcasting instructions, selecting the "Video" source as your broadcast source: Boomstream OBS Guide -
Detailed Setup Instructions
For comprehensive OBS configuration, see: Detailed OBS Setup Guide
Option B: Broadcasting Using FFmpeg
-
Install FFmpeg
Download and install the latest version from the official website: https://www.ffmpeg.org/download.html -
Run the Streaming Command
Open your terminal/console and execute the following command:Bashffmpeg -i "rtsp://CAMERA_IP_ADDRESS:554/live" -vcodec copy -acodec copy -f flv rtmp://live.boomstream.com/live/YOUR_BROADCAST_CODE -
Codec Requirements
The camera must output the stream in H.264/AAC codecs. If your camera uses different codecs, you need to transcode the stream:Bashffmpeg -i "rtsp://CAMERA_IP_ADDRESS:554/live" -vcodec libx264 -acodec aac -f flv rtmp://live.boomstream.com/live/YOUR_BROADCAST_CODENote: The specific codec flags may vary depending on your installed FFmpeg libraries.
Quick Setup Checklist
| Method | Steps |
|---|---|
| Direct IP Camera | 1. Connect camera to internet 2. Get RTSP link 3. Add camera in Online Broadcasts → Create → IP Camera 4. Configure settings |
| OBS Studio | 1. Install OBS + plugin 2. Add "Video" source with RTSP link 3. Configure Boomstream stream key 4. Start broadcasting |
| FFmpeg | 1. Install FFmpeg 2. Run command with RTSP input 3. Use your broadcast code in the RTMP URL |
✅ Done!
Your IP camera is now broadcasting to Boomstream. Choose the method that best fits your technical setup and start streaming!