
How to Broadcast with Third-Party Encoders in Boomstream (OBS, FME, etc.)
You can stream live video to the Boomstream platform using third-party broadcasting software such as OBS Studio, Flash Media Live Encoder (FMLE), and others. To get started, you will first need to install and configure your preferred encoder (e.g., follow our Open Broadcaster Software setup guide).
This step-by-step guide explains how to configure and start a live broadcast via Boomstream using a third-party encoder.
Step-by-Step Broadcasting Instructions
Step 1: Create a New Broadcast
To add a new broadcast in your account:
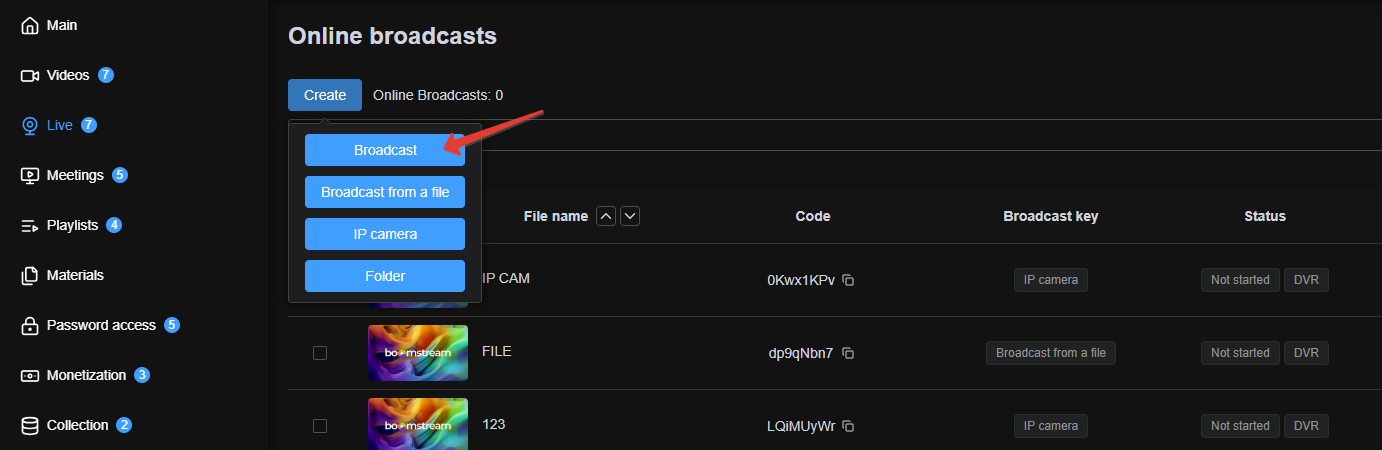
- Go to the Online Broadcasts section.
- Click the Create button.
- Select your desired broadcast type.
- In the window that opens, enter a descriptive name (this name will be displayed in the player during stream playback).
Step 2: Navigate the Broadcast Card
Clicking on the broadcast name opens the broadcast card, which contains all the settings and management tabs for your stream.
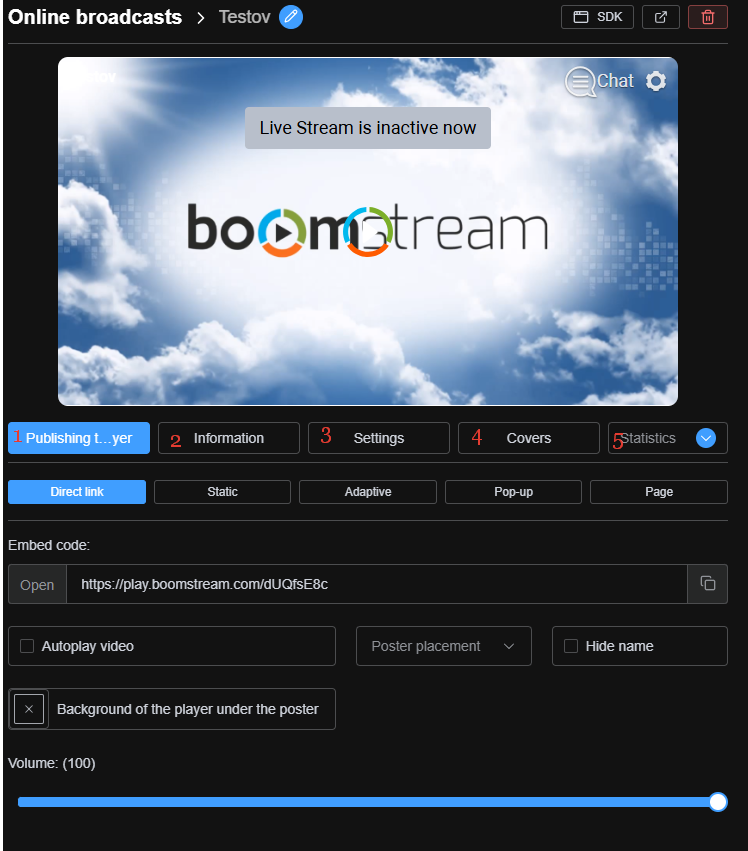
Here is a breakdown of the available tabs and their functions:
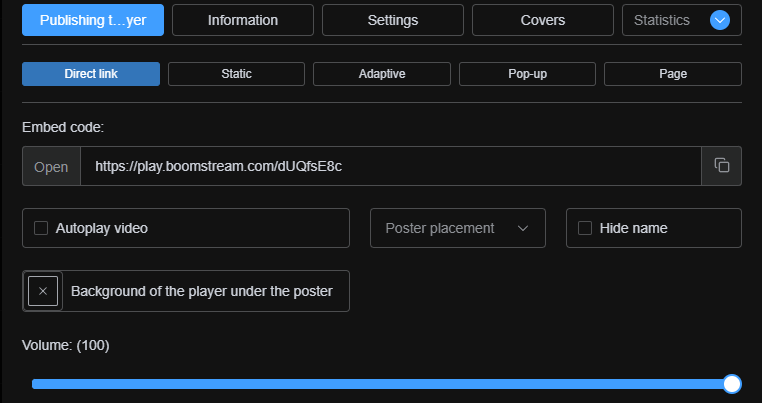
1. Player Publishing
Retrieve the direct broadcast link or the HTML iframe code for embedding the player on your website or resources.
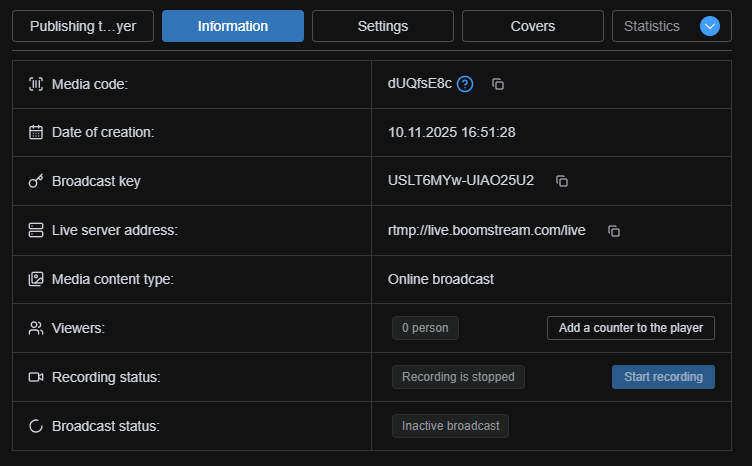
2. Information
View essential broadcast details, including the Stream Key and Server Address required to connect your third-party encoder.
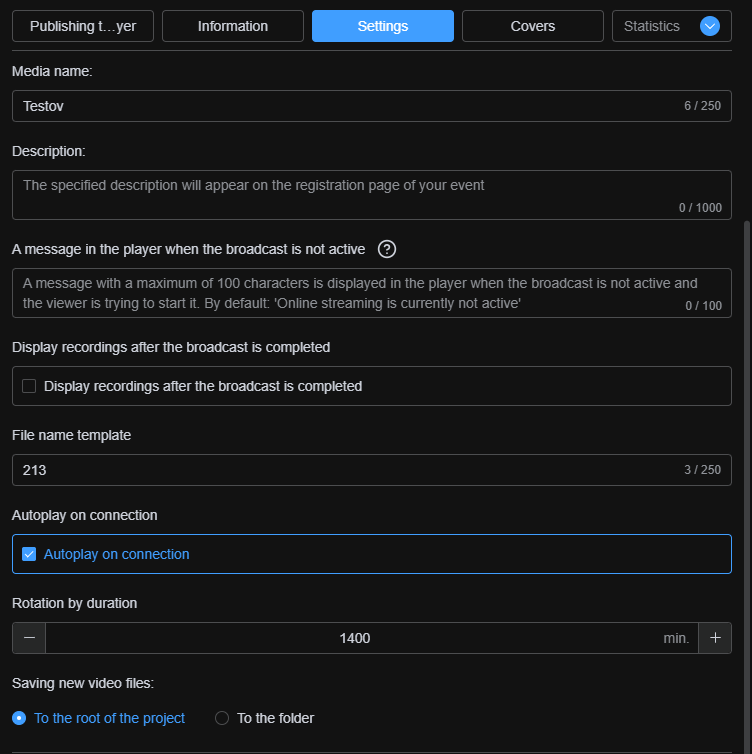
3. Settings
Configure broadcast behavior: disable recording, add custom text for when the broadcast is inactive, set up a countdown timer, etc.
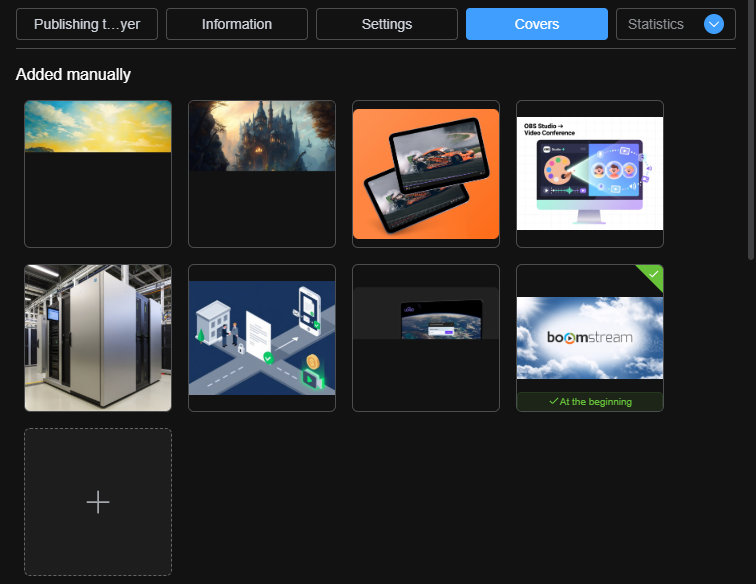
4. Covers
Add, change, or remove the thumbnail cover image for your broadcast.
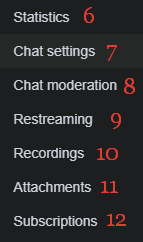
5. Additional Tabs Menu
Clicking this section expands a menu with advanced configuration options:
| Tab | Description |
|---|---|
| Statistics | View detailed broadcast analytics and viewer data for a specific period. |
| Chat Settings | Enable and configure the live chat. |
| Chat Moderation | Manage and moderate chat messages in real-time. |
| Restreaming | Activate restreaming to YouTube, Facebook, or any custom RTMP server. |
| Recordings | Add or remove recorded versions of the broadcast. |
| Attachments | Add or remove additional materials (e.g., text files, presentations) to the player. |
| Subscriptions | View, add, or remove the broadcast from specific access lists (password or paid access). |
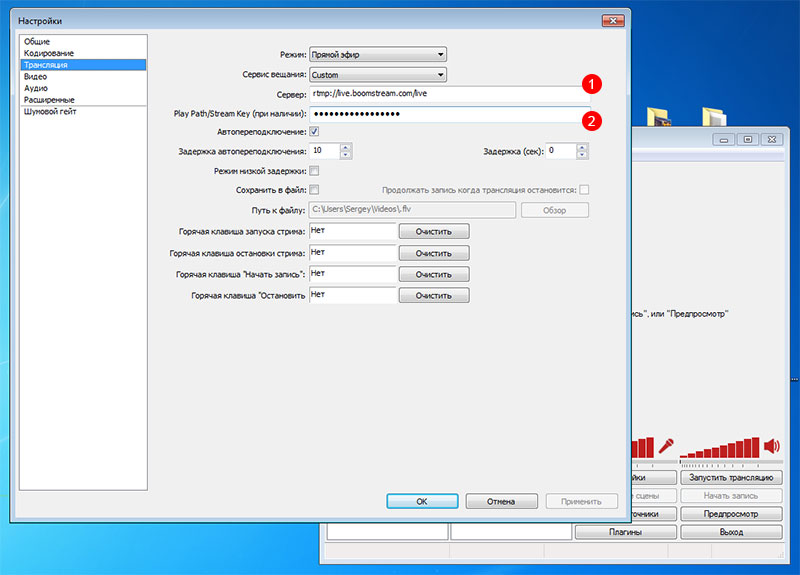
Step 3: Configure Your Encoder
To connect your software to Boomstream, copy the Stream Key and Server Address from the Information tab (Step 2.2) and paste them into the corresponding fields in your third-party encoder settings.
Step 4: Start Broadcasting
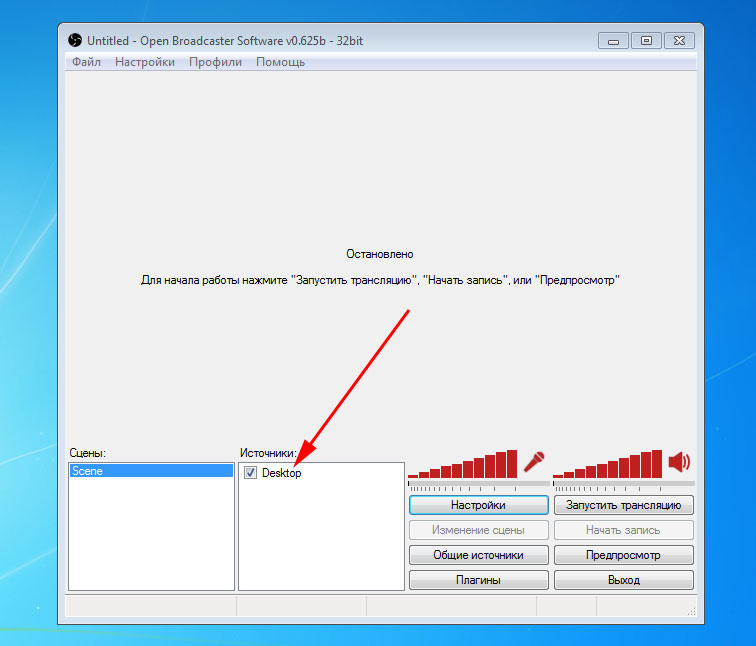
In your encoder software, select your video/audio sources and click Start Streaming (or the equivalent button).
Step 5: Publish the Player
Copy the direct link or HTML embed code from the Player Publishing tab (Step 2.1) and share it with your viewers or embed it on your website.
Live Broadcast Player Example
https://play.boomstream.com/page.html?code=vWktqOGl
Quick Setup Checklist
| Step | Action |
|---|---|
| 1 | Create a new broadcast in Online Broadcasts |
| 2 | Copy the Stream Key and Server Address from the Information tab |
| 3 | Paste the stream key and server address into your third-party encoder |
| 4 | Start streaming from your encoder software |
| 5 | Publish the player link or HTML embed code to your viewers |
✅ Done!
Your live broadcast is now successfully streaming via a third-party encoder to the Boomstream platform and is ready for your audience.