
How to Use the Updated Boomstream Web Application for Live Broadcasting
We have refreshed the design of our web application for live broadcasting to provide a smoother, more intuitive streaming experience directly from your browser. Below is a step-by-step guide to the new interface and features.
Step-by-Step Broadcasting Guide
1. Launch the Built-in Application
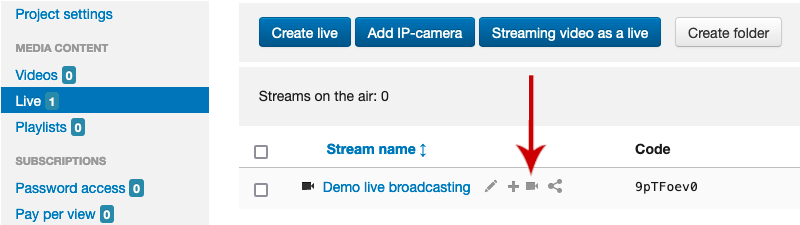
To begin, locate and click the functional button depicting a camera icon. This will launch the built-in live broadcasting application.
2. Open the Player Configuration Window
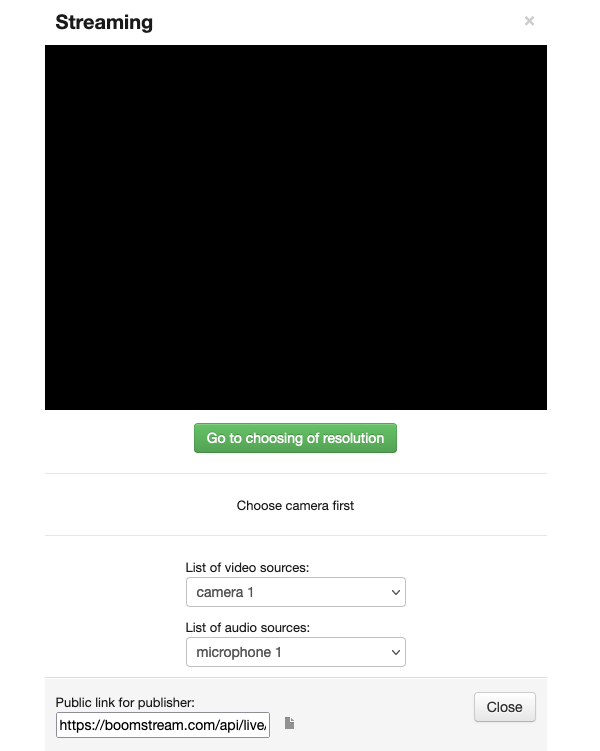
After clicking the camera icon, the live player configuration window will automatically open.
3. Select Resolution and Configure Settings
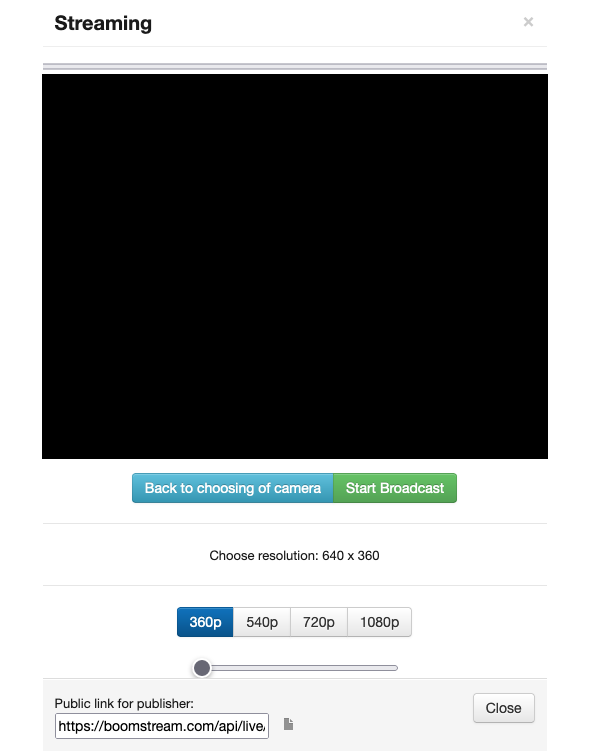
Click on the "Go to choosing of resolution" button to open the advanced configuration menu. From this screen, you can:
- Choose your desired broadcast resolution.
- Navigate back to the previous screen.
- Copy the public link for publishing the stream.
- Initiate the broadcast.
4. Start Broadcasting
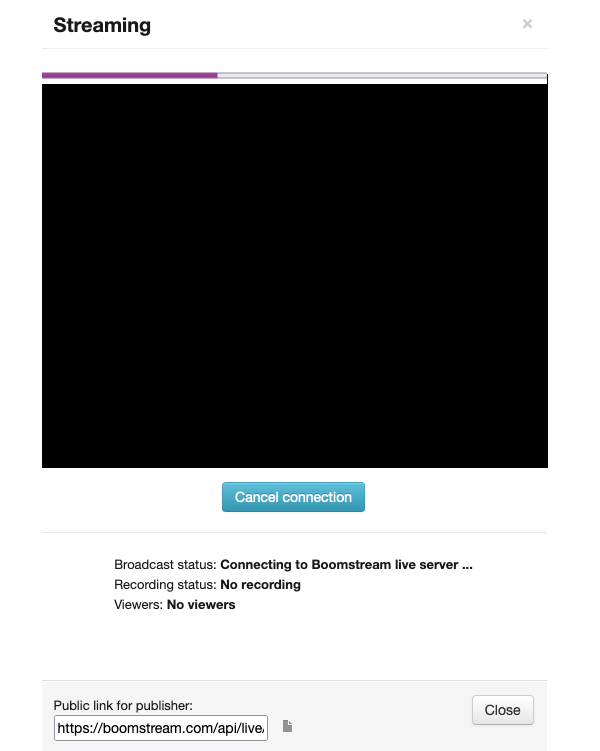
Click the Start broadcast button to begin your live stream. Once active, your current settings and real-time metrics will be displayed directly below the "Cancel connection" button, including:
- Broadcast status (Live/Offline)
- Recording status (Active/Inactive)
- Current viewers count
Quick Setup Checklist
| Step | Action |
|---|---|
| 1 | Click the camera icon to launch the built-in application |
| 2 | Wait for the player configuration window to open |
| 3 | Select your resolution and configure publishing settings |
| 4 | Click Start broadcast to begin live streaming |
✅ Done!
The updated web application makes it easier than ever to start and manage live broadcasts directly from your browser with just a few clicks.