
How to Set Up Paid Access for Video or Live Stream in Boomstream
The Boomstream platform allows you to monetize videos and live streams in just a few steps using the payment widget built directly into the player.
Prerequisite: You must first sign an agent agreement or connect your own custom payment gateway.
Step-by-Step Setup Guide
Step 1: Upload or Create Content
First, ensure your content is ready. Upload a video to the Boomstream system or create a Live Broadcast.
Step 2: Fill Out Seller Contacts
Navigate to the Paid Access section. The Create monetizations button will remain unavailable until you fill out the Seller Contacts field.
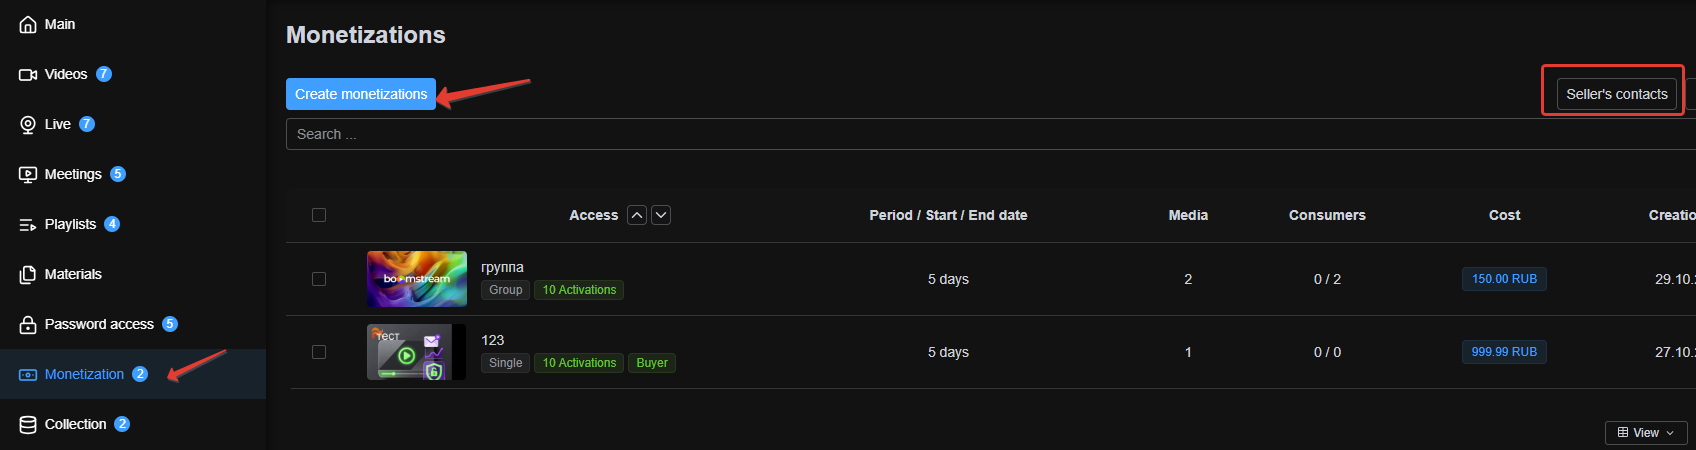
⚠️ Important: The information provided here is public and will be visible to the buyer. This information is also displayed in the automated email the buyer receives after a successful payment.
Step 3: Configure Access Parameters
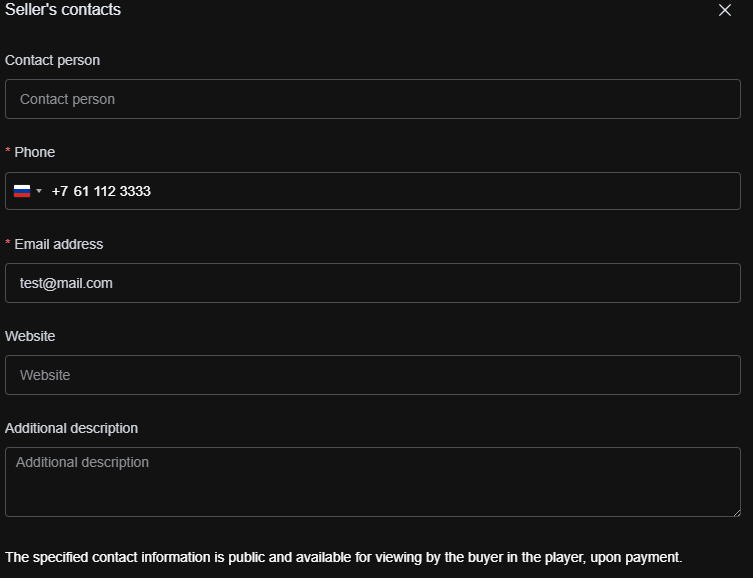
After filling out the contacts, click Create monetizations. In the pop-up window, configure the following access parameters:
| Parameter | Description |
|---|---|
| Name | Displayed on the payment page and in email messages to the buyer. |
| Type | Single: User gets access only to the specific video/broadcast they paid for. Group: User gets access to all videos/broadcasts included in this paid access rule. |
| The buyer pays the payment gateway commission | If checked, the buyer pays the 5% gateway commission (added to the final price). If unchecked, the seller absorbs the commission. |
| Price | The cost of purchasing the video content. |
| Purchase Currency | The currency for the transaction. |
| Period | The number of days of access to the content after payment. |
| Access End Date | You can set a period and/or an exact end date. If both are set, the end date takes priority over the period. |
| Number of Password Activations | The maximum number of times this access can be activated. The user can restore access on different devices/browsers using the password sent via email after payment. |
| Prevent Simultaneous Viewing | Prohibits simultaneous viewing of the video using the same password across multiple devices. |
Step 4: Manage the Paid Access Card
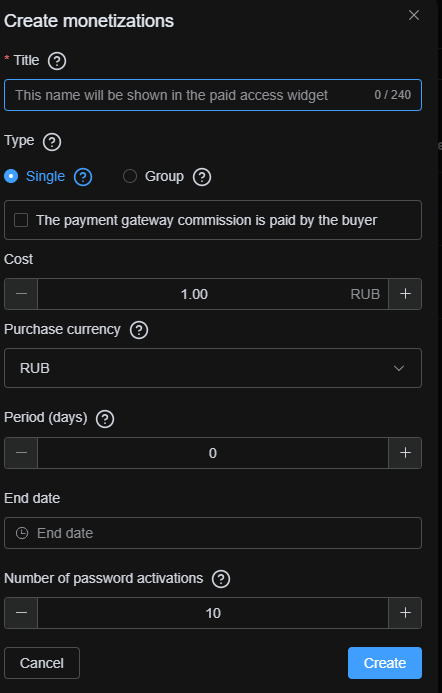
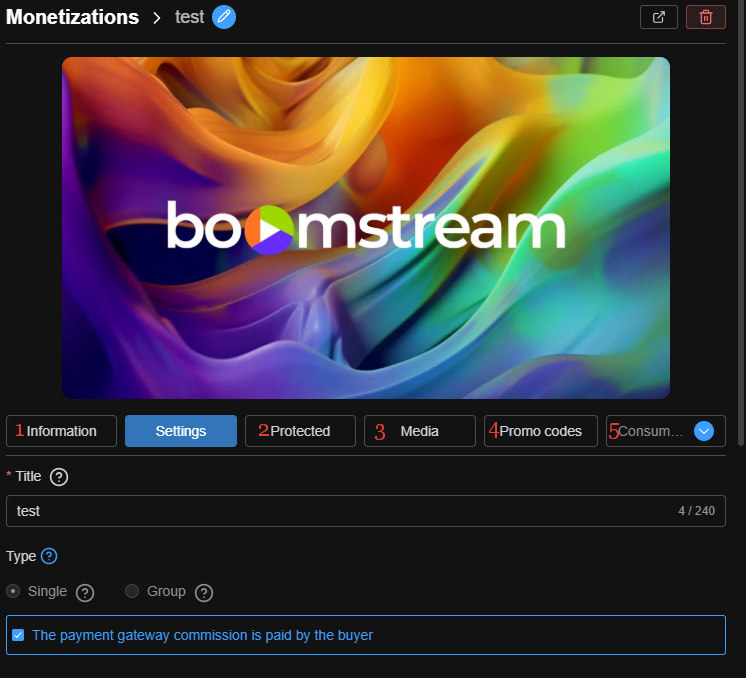
After creation, the Paid Access Card will open, allowing you to modify all parameters.
Main Parameters
| Parameter | Description |
|---|---|
| Name | Displayed on the payment page and in buyer emails. |
| Type | Single or Group access. |
| The buyer pays the payment gateway commission | Controls who pays the 5% commission fee. |
| Price | Cost of purchasing the content. |
| Purchase Currency | Transaction currency. |
| URL to redirect the viewer to after purchase | If filled, the viewer is redirected here after payment. If empty, they are directed to the player with the purchased media (e.g., https://boomstream.com). |
| Link in the buyer's email | Determines the link type in the password email: to the purchase page or directly to the purchased media. |
| Period | Number of days of access after payment. |
| Access Start Date | Date when access begins, passwords are accepted, and media becomes available. |
| Access End Date | Exact expiration date (takes priority over "Period" if both are set). |
| Number of Password Activations | Maximum allowed access activations. |
| Description | Description of your media, displayed in the payment widget. |
| Additional Materials | Links to external resources (e.g., Google Drive, PDFs). |
| Preview Time | Time in seconds a viewer can watch the video before the payment prompt appears. |

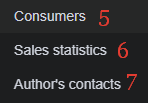
Step 5: Utilize Additional Tabs in the Paid Access Card
| Tab | Description |
|---|---|
| 1. Information | Basic metadata: creation date, access period, number of activations, and subscription code. |
| 2. Security | If download protection is active, enable Prevent Simultaneous Viewing and configure Dynamic Watermarks. |
| 3. Media | Shows linked media files and allows you to add new ones. |
| 4. Promo Codes | Create and manage discount promo codes. Instruction Guide. |
| 5. Consumers | List of all buyers with passwords and session info. You can manually add a consumer, change activation limits, or modify expiration dates. |
| 6. Sales Statistics | Detailed sales data, broken down by day. |
| 7. Author Contacts | Seller data displayed in the email and payment widget. |
⚠️ Important: When you manually add a buyer to paid access, they will automatically receive an email containing the link to the content and their unique access password.
⚠️ Important for Group Access: If you add a buyer to a Group access rule, you can select any video from the list (e.g., the first one) to include in the email. The buyer will still be able to view all videos included in that paid access rule.
Step 6: Get the Player Embed Code
Retrieve the iframe player code or the direct link to the video, live stream, or playlist. Place this code on your website or resource to start selling.

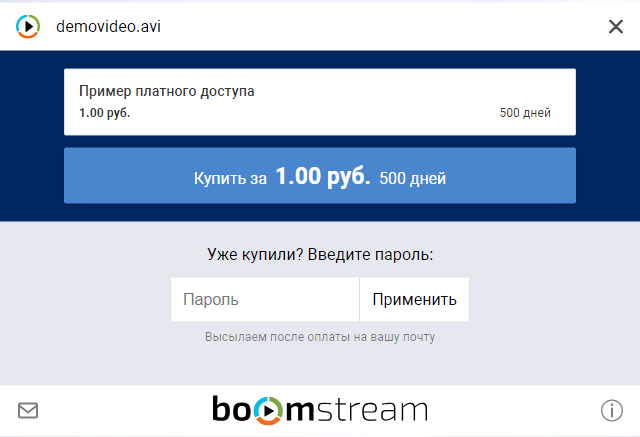
Step 7: Example of a Player with Paid Access
Below is an example of how the Boomstream player looks when paid access is enabled, displaying the purchase widget.
Live Example:
https://play.boomstream.com/page.html?code=zgnUqB24
Quick Setup Checklist
| Step | Action |
|---|---|
| 1 | Upload a video or create a live broadcast |
| 2 | Fill out Seller Contacts in the Paid Access section |
| 3 | Configure access parameters (type, price, period, activations) |
| 4 | Add media to the access rule via the Media tab |
| 5 | Retrieve the player code and publish it on your resource |
✅ Done!
Your video content is now fully configured for sale, with a secure payment system built directly into the player.