
How to Integrate Boomstream with Moodle: Video Protection and Dynamic Watermarks
The Boomstream plugin for Moodle protects your videos and live streams from unauthorized downloading and displays unique, dynamic watermarks with the viewer's personal data during playback.
How the Integration Works
- A student opens a lesson in Moodle.
- The plugin detects the Boomstream player on the page and securely transmits the student's data to the Boomstream database.
- When the student clicks "Play", the plugin automatically authorizes them in the player.
- The player dynamically overlays watermarks displaying the student's email, full name, and device IP address.
Part 1: Configuration in Your Boomstream Account
To enable student data display and protection, configure the following settings in Boomstream:
1. Create Password Access
Navigate to the Password Access section and initiate a new access rule.
Note: You must fill out the Seller Contacts field before proceeding. This data is required by the system for internal processing and will not be displayed to viewers.

2. Configure Access Parameters
After entering the contact data, click Create Password Access. In the configuration window, set the following parameters (these are visible only to you):
| Field | Recommended Setting |
|---|---|
| Name | Any descriptive name (e.g., "Moodle Course Access") |
| Access End Date | 01/01/2099 (or your desired expiration date) |
| Number of Password Activations | 10000 (or higher, depending on student count) |
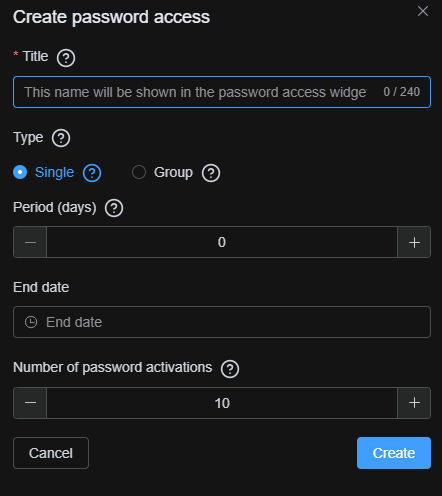
Click Create to open the password access card.
3. Enable Dynamic Watermarks
Navigate to the Security tab within the access card and activate the Show Watermarks option. Configure the specific settings:
- Show watermark in player: Check this box.
- Show buyer's email as a watermark: Check this box.
- Show buyer's IP as a watermark: Check this box.
(Optional) You can also activate Prevent Simultaneous Viewing. When enabled, a user cannot watch the video from multiple devices under the same account at the same time.
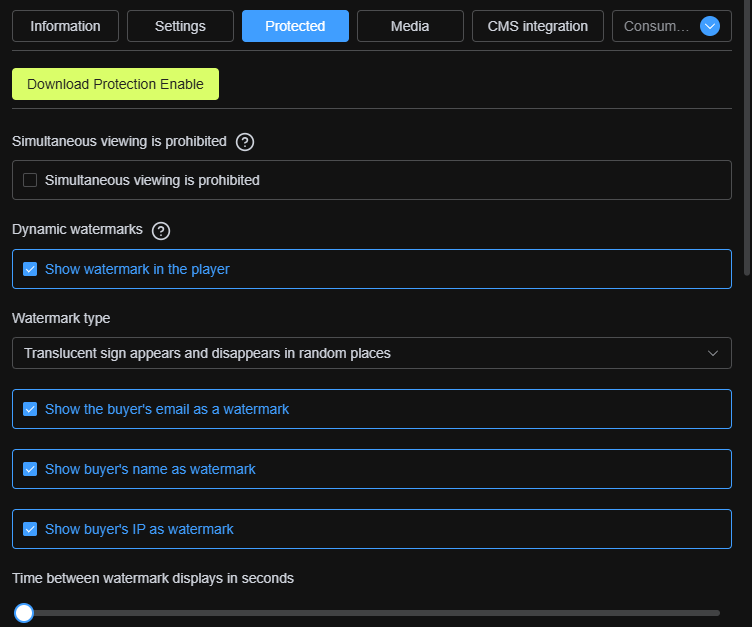
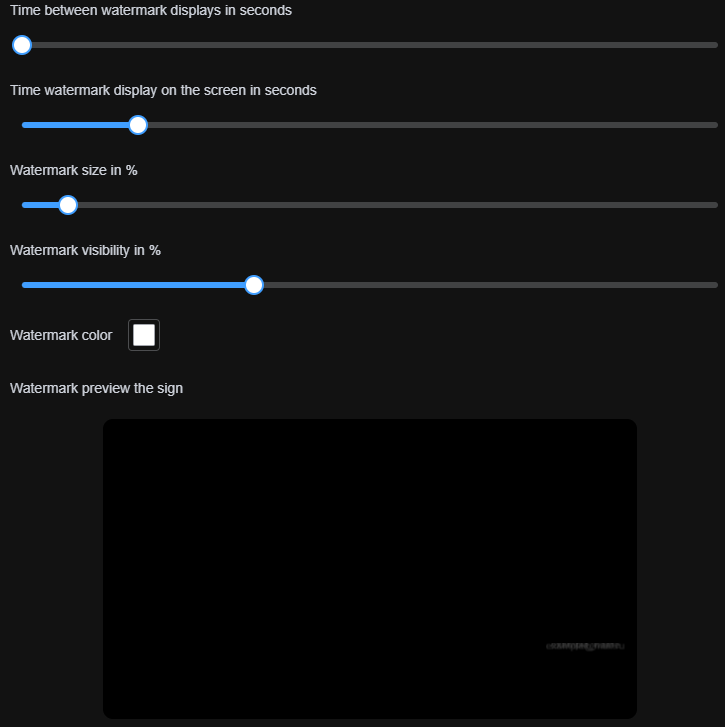
You can further customize the visual appearance of the watermarks in the dedicated settings menu.
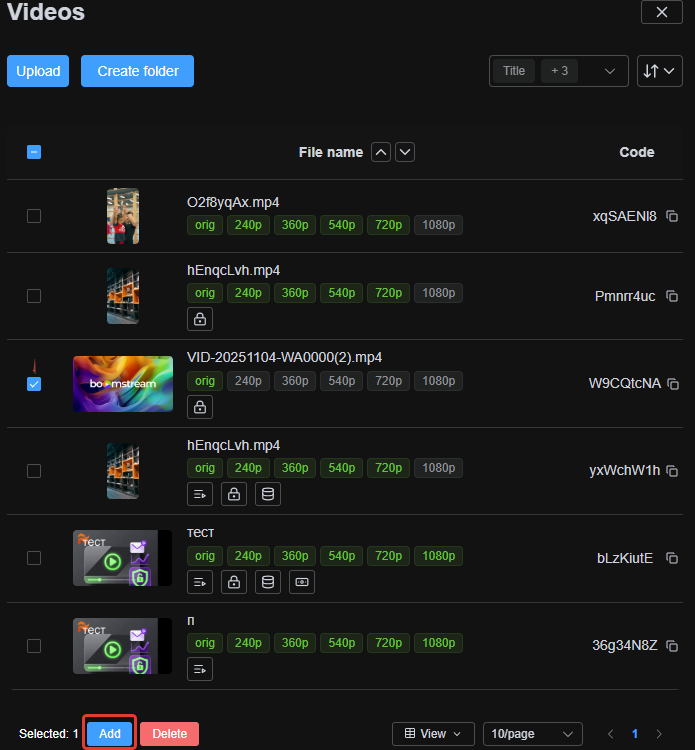
4. Add Videos to the Access Rule
Link your content to this protection rule. In the Media tab, click the Add button, select the media type, and choose the desired videos from your library.

5. Get the Player Embed Code
Go to the Player Publishing tab and copy the JavaScript (JS) embed code. You will use this code on your Moodle platform.
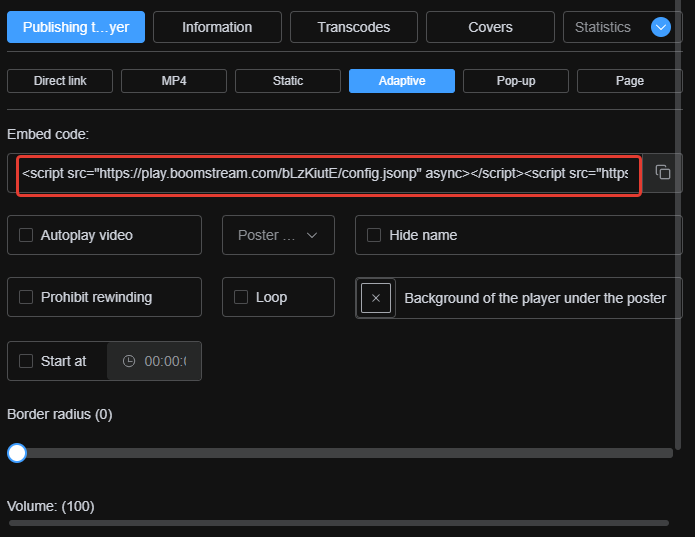
Part 2: Plugin Configuration in Moodle
To complete the integration, configure the plugin within your Moodle environment:
1. Install the Plugin
Download and install the Boomstream Video Platform plugin into your Moodle system.
2. Enter Integration Credentials
Navigate to the plugin settings in Moodle. You only need to configure three key parameters:

| Parameter | Description & How to Find It |
|---|---|
| Hostname | Your player's domain. The default is play.boomstream.com. To verify, check the URL of any player in your Boomstream account. |
| API Key | Found in Boomstream under Project Settings (gear icon) → CMS Integration tab. Recommendation: Create a dedicated API key for Moodle and ensure its type is set to "for writing". |
| Subscription code | This is the unique code of the Password Access rule you created in Part 1. Open the access rule and copy the code from the Information tab. |
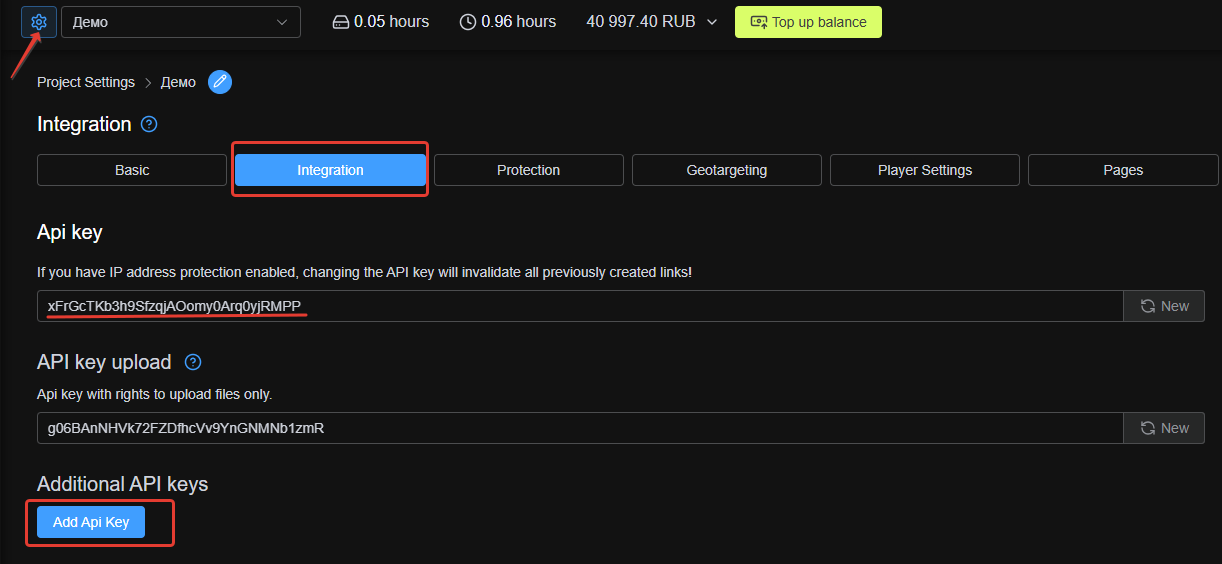
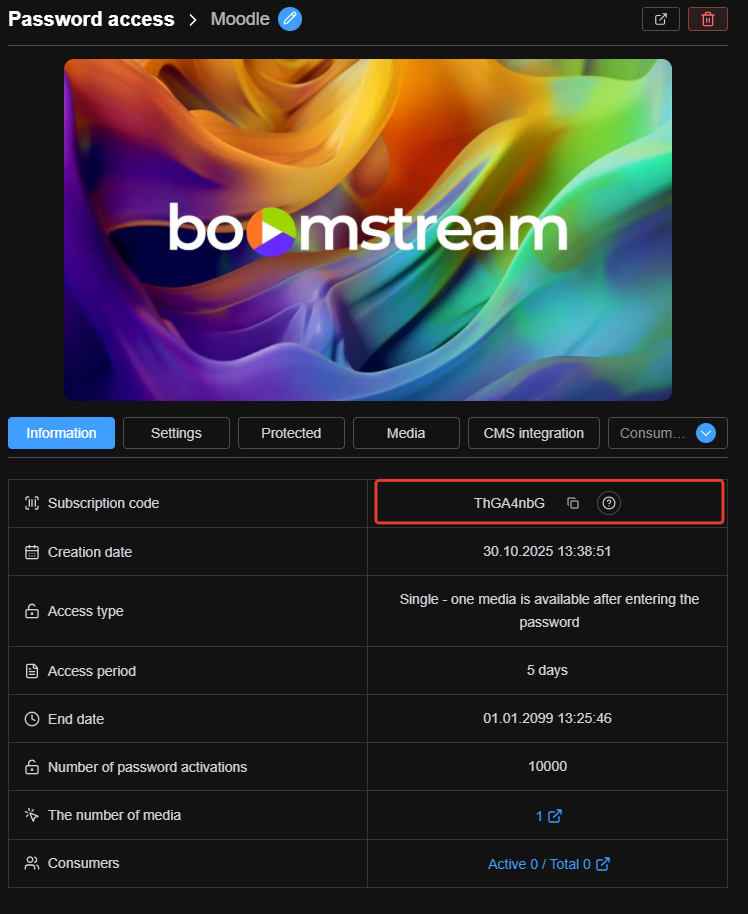
✅ Done!
Once configured, the Moodle plugin will automatically and securely transmit student data to the Boomstream player. During playback, dynamic watermarks with each viewer's personal data will be displayed, providing robust, automated protection for your educational content.