
How to Broadcast from a Video File in Boomstream
Use a pre-recorded video file as the source for your live broadcast. This feature is ideal for running automated webinars, creating 24/7 continuous streaming playlists, or scheduling broadcasts to start at a specific time.
You can also monetize these streams by selling access to recorded video broadcasts just like regular broadcasts or by setting up a password-protected broadcast.
Step 1: Create an Online Broadcast from a Video File
To get started, initiate a new online broadcast using a video file as the source.
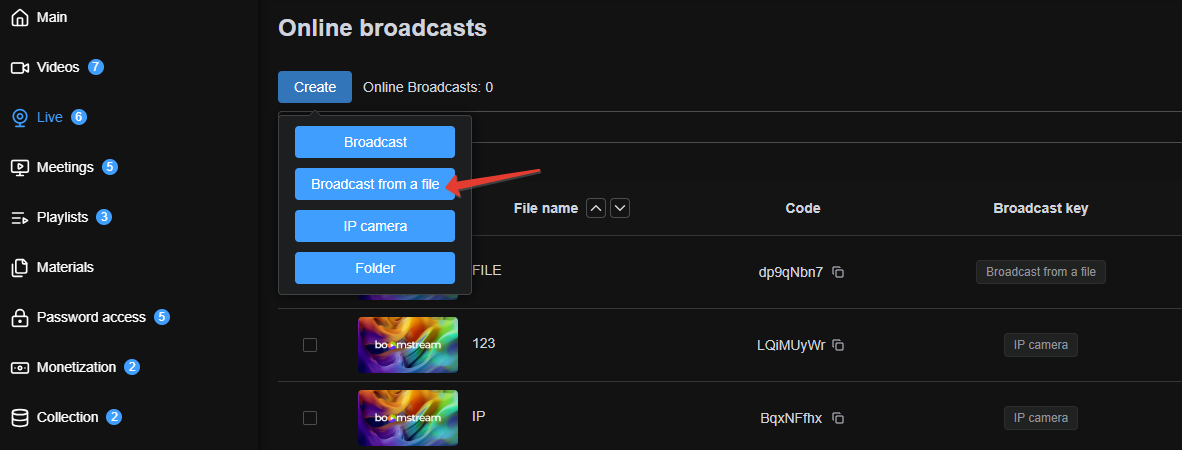
Step 2: Navigate the Broadcast Interface
Once the broadcast is created, click on its name to reveal the comprehensive management menu.
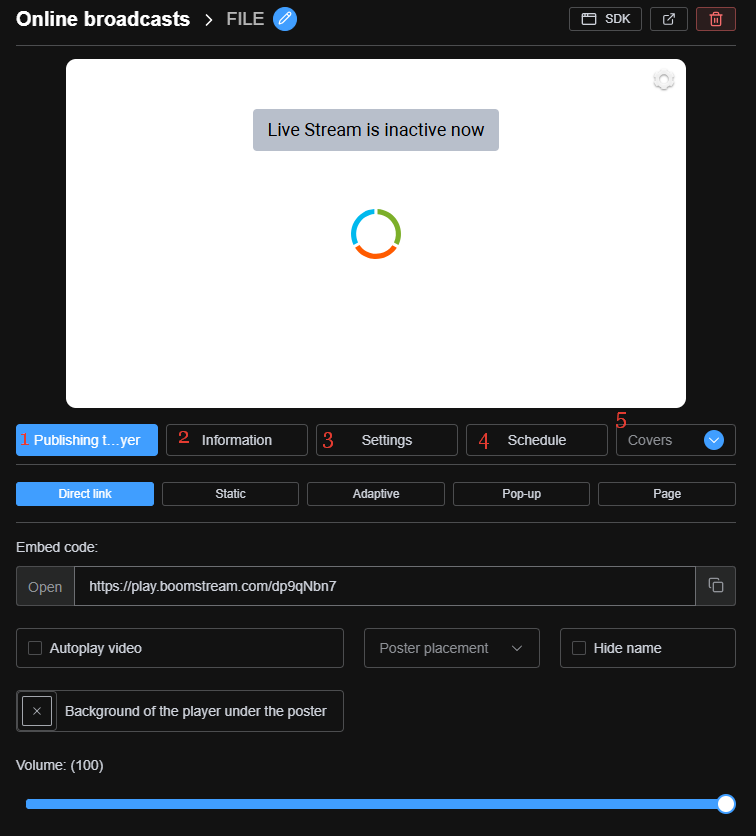
1. Publishing Player
This tab provides the tools to share your stream:
- Direct broadcast link
- iframe player code for embedding the broadcast on your website or resource
| Option | Description |
|---|---|
| Autostart | Activates the player immediately upon page load, provided the broadcast is currently active. |
| Hide title | Hides the broadcast title, displaying only the 'play' icon for a cleaner look. |
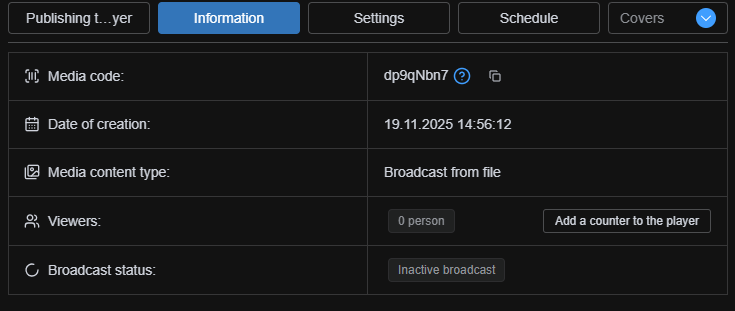
2. Information
This section displays general data and metadata about the current broadcast.
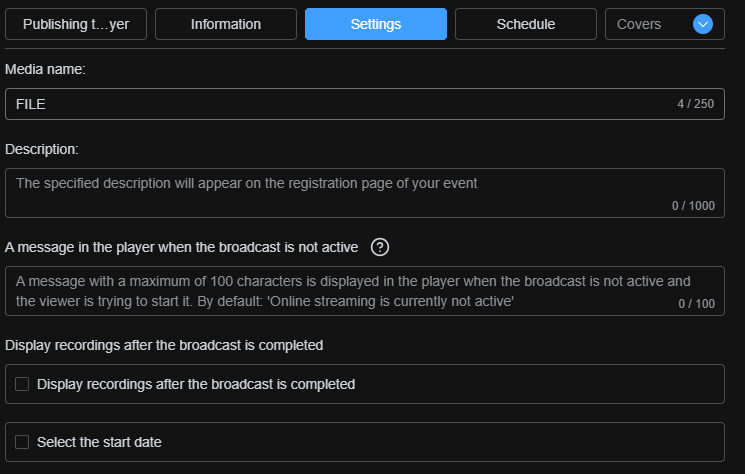
3. Settings
Configure how the player behaves after the stream ends.
| Option | Description |
|---|---|
| Display recordings after the broadcast completed | When active, clicking the play button after the stream ends will show an offline message and offer the viewer the option to play the attached video file. |
4. Schedule & Playback
Clicking the Start Broadcast button opens a menu where you can select the video file for broadcasting. The broadcast will begin immediately upon selection.
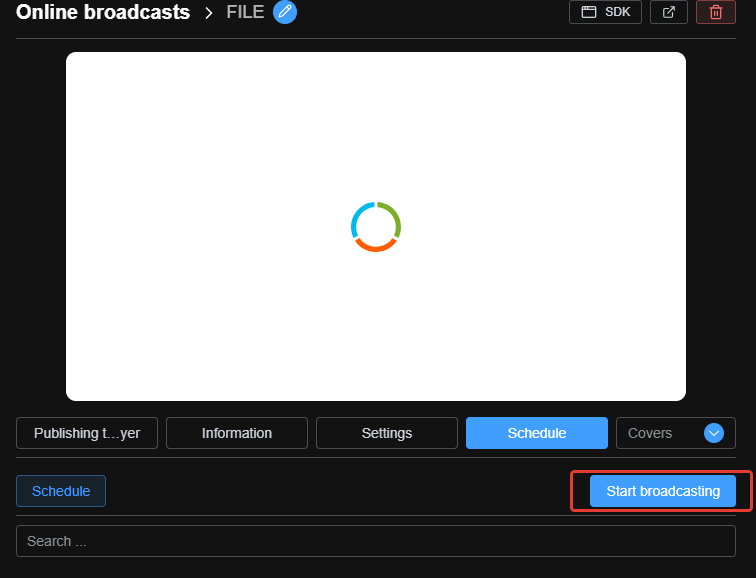
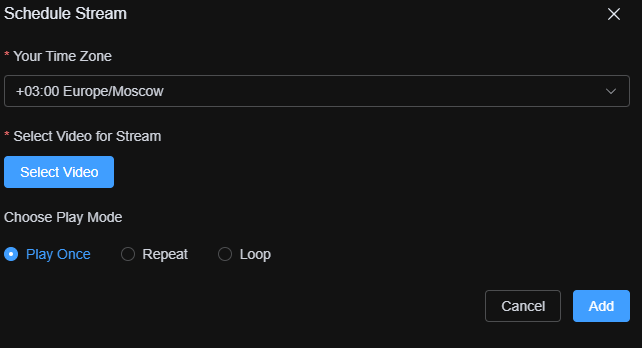
Note: The video file must be located in the same project as the broadcast. To upload a video file to the project, please refer to the video uploading guide.
Playback Options:
- Loop: Check the "Loop" box to make the video play infinitely. (Note: If loop mode is enabled, you cannot add or schedule other videos in this specific broadcast).
- Schedule: Click the "Schedule" button to set a specific date and time for the broadcast to start automatically.
5. Additional Tabs
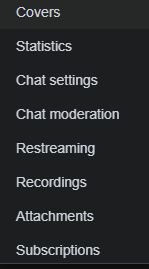
Clicking this section expands a menu with advanced configuration tabs.
| Tab | Description |
|---|---|
| Covers | Select a platform-generated screenshot as the broadcast cover, or upload your own custom image. |
| Statistics | View detailed analytics on the number of views and total broadcast hours. |
| Chat Settings | Enable and configure the live chat for viewer interaction. |
| Chat Moderation | Monitor and moderate chat messages in real time. |
| Restreaming | Enable and configure a custom broadcasting server for multistreaming. |
| Recordings | Add any video stored on the platform as a broadcast recording. (Go to "Video Files", check the box next to the desired video, and click "Add to online broadcast"). |
| Attachments | Add supplementary materials (e.g., PDFs, links) to the player for the broadcast. |
| Subscriptions | View current broadcast access permissions and assign the broadcast to new access rules. |
Quick Feature Summary
| Feature | Use Case |
|---|---|
| Automated webinars | Run webinars automatically from a pre-recorded video file. |
| 24/7 broadcasting | Create a continuous streaming playlist without manual intervention. |
| Scheduled broadcasts | Set a specific date and time for the stream to go live. |
| Loop mode | Play a single video infinitely (restricts adding other videos). |
| Sell access | Monetize recorded broadcasts just like regular live streams. |
| Password protection | Restrict broadcast access to authorized viewers only. |
✅ Done!
You can now successfully create and manage online broadcasts from video files, enabling automated webinars, 24/7 streaming, or precisely scheduled events.